


Product Details
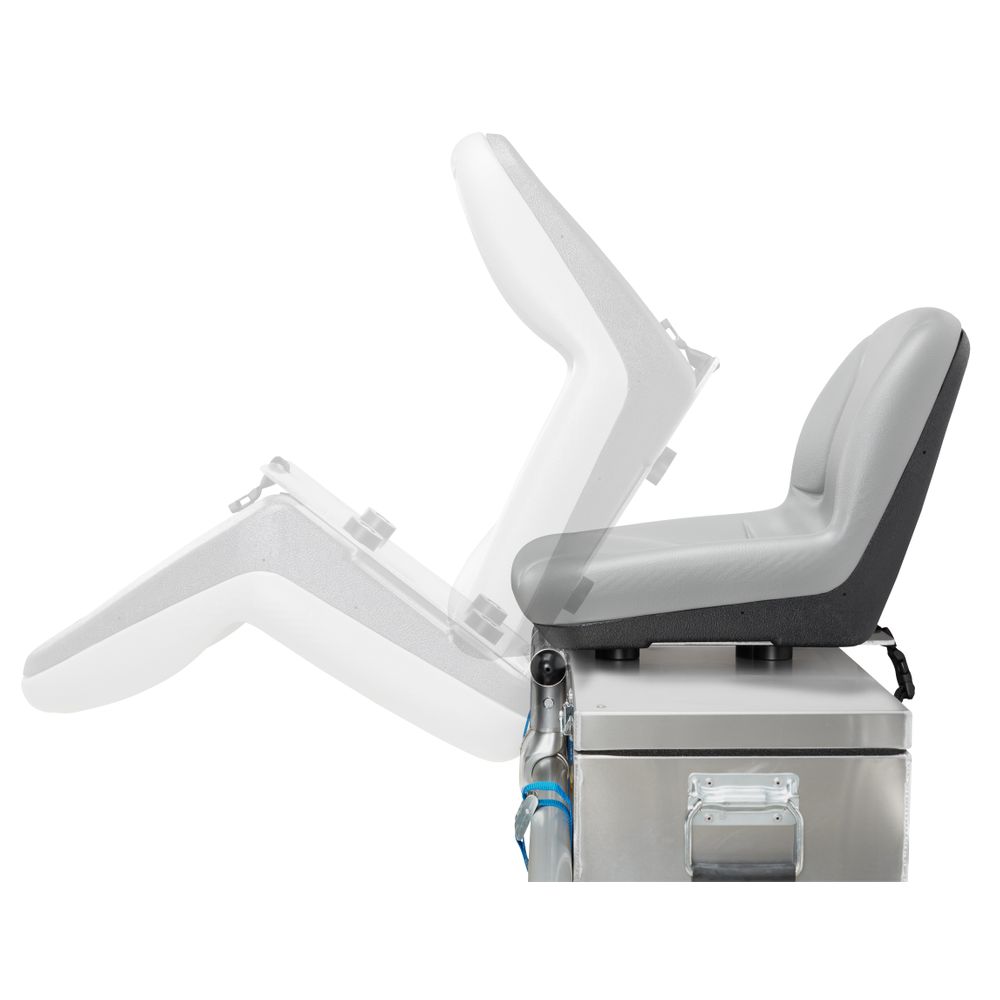
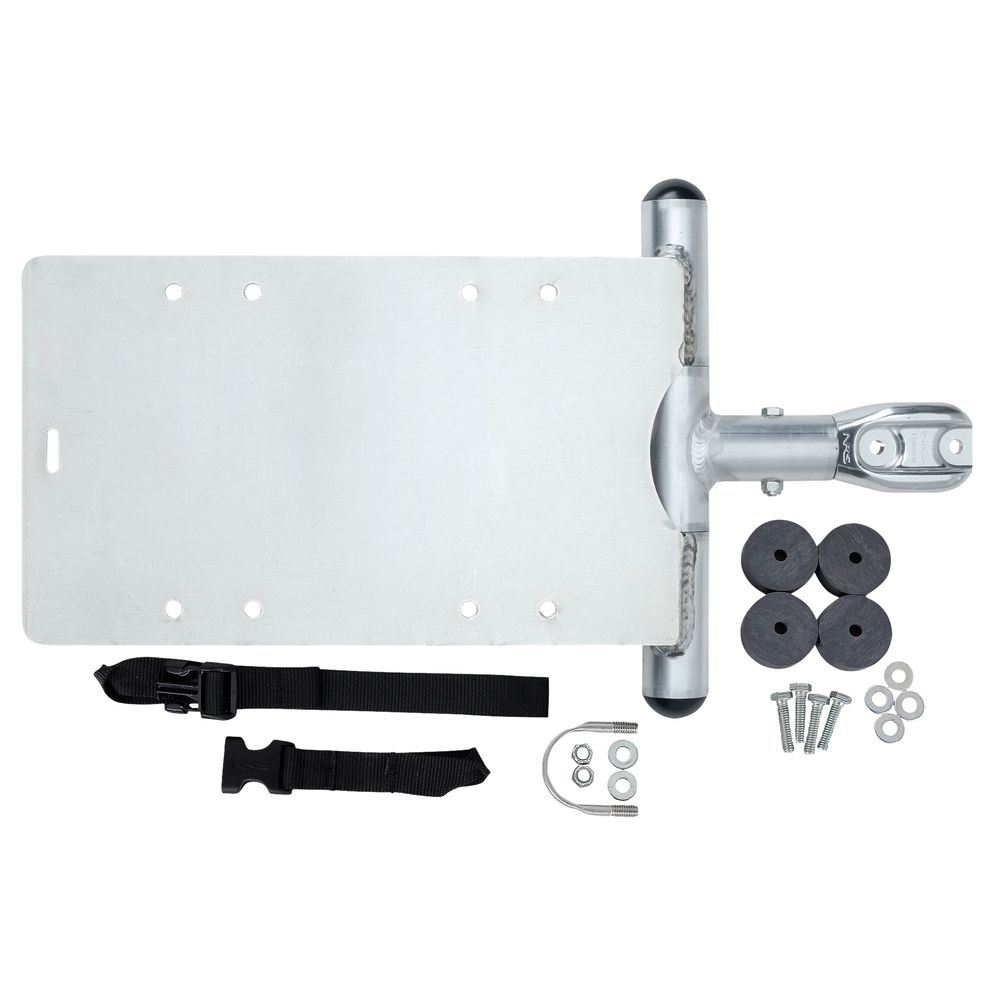
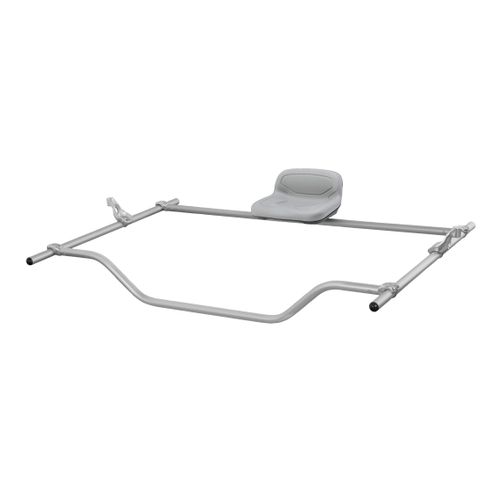
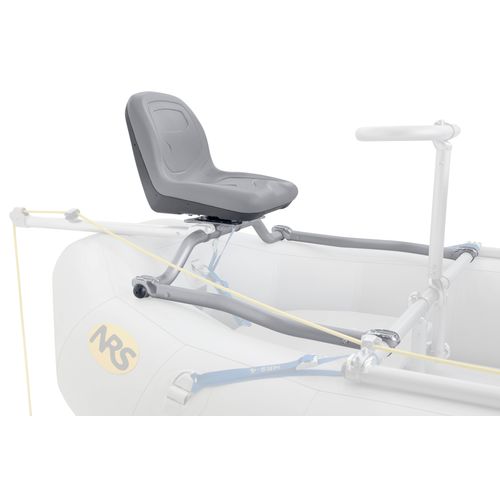
Row in style and comfort when seated over your cooler or dry box. The NRS Frame Flip Seat Mount supports a padded raft seat and tilts forward out of the way to access the cooler or box beneath.
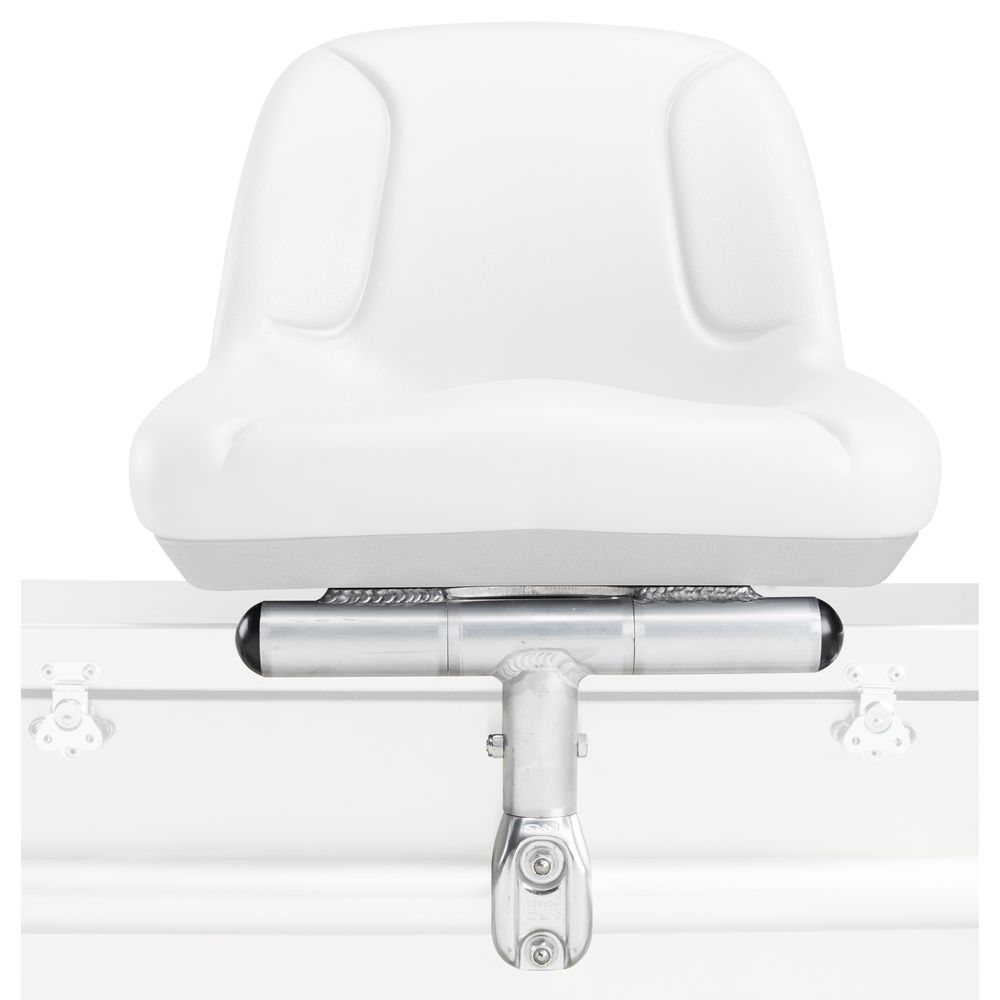
- The Seat Mount attaches securely to the crossbar using our LoPro™ Frame Fittings.
- Use NRS Adjustable Cooler or Dry Box Mounts (sold separately) to adjust the cooler or dry box height to fit the Seat Mount. Alternatively, you can weld tabs on an aluminum dry box.
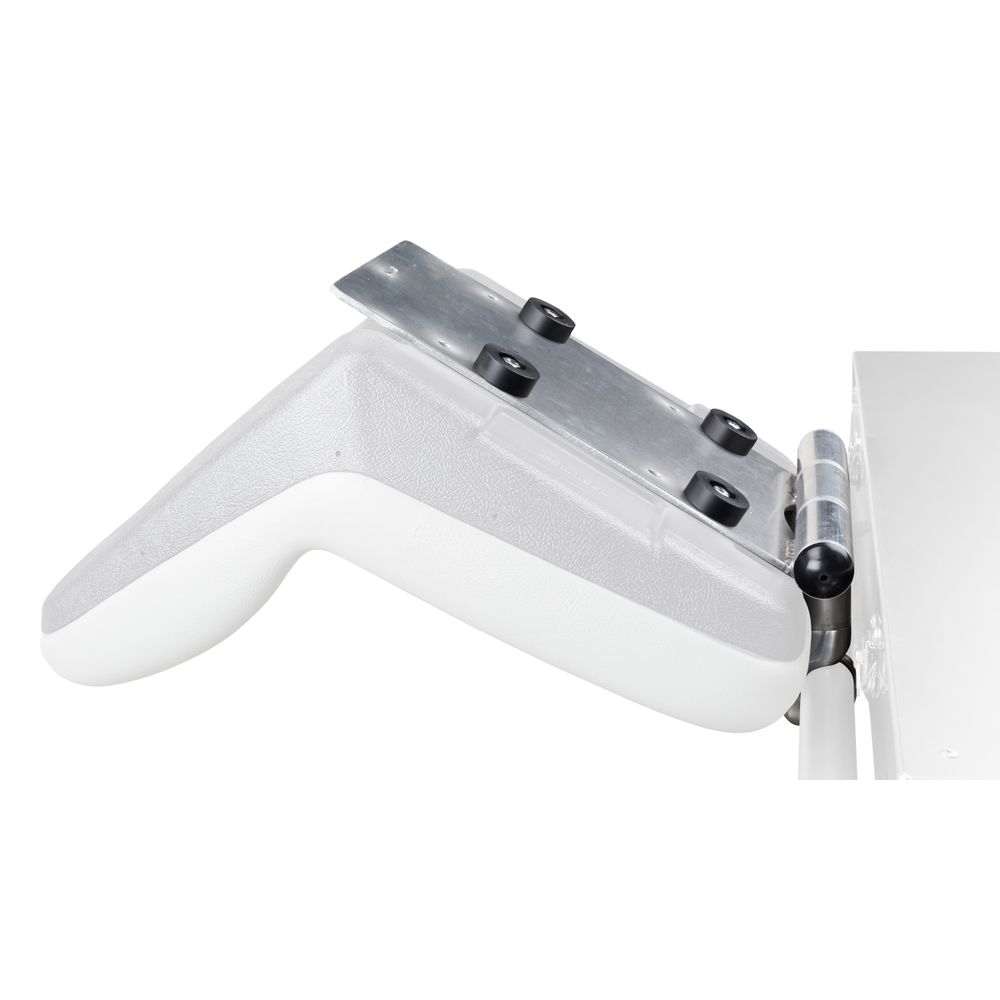
- The Mount uses four 2" diameter spacers to protect your cooler or dry box lid from the seat bolt heads.
- The Mount places the bottom of the spacers (top of your cooler or dry box) 6" above the center of the crossbar the Mount is attached to.
- Measure to make sure this rise allows your cooler or dry box to be supported above your raft floor or cataraft frame. If you need a different rise, contact us for more options.
- Since the Flip Seat Mount puts you higher than if your seat was on a Seat Bar, the NRS 10" Oar Mounts, Item # 91042.02, are the best oar mounts to use with it.
- Two sets of bolt holes accommodate both Low-Back and High-Back Drain-Hole Seats (sold separately).
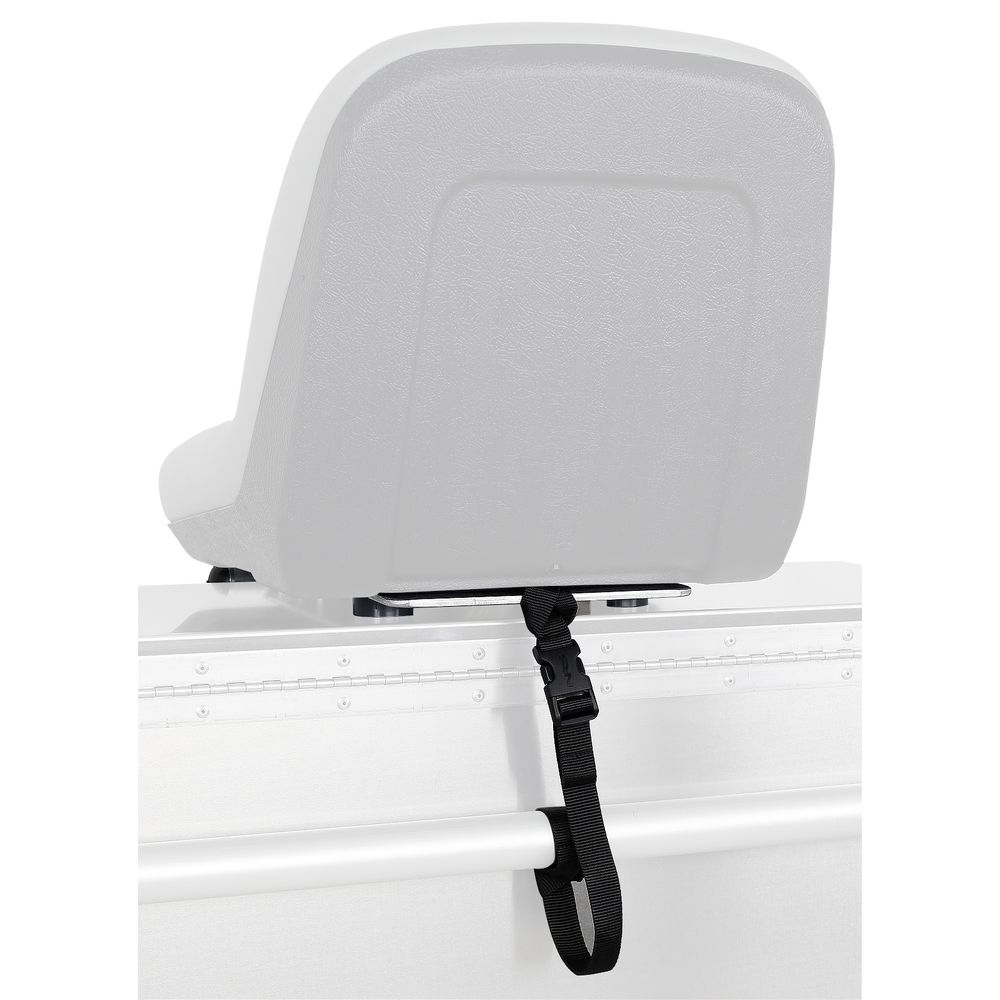
- A tie-down strap with quick release buckle for securing the Mount to the back crossbar is included.
More Information
Specs
| Category: |
|
|---|---|
| Material: | 1-5/8" 6061-T6 Anodized Aluminum Frame Pipe |
| Included Components: |
|
| Includes: |
|

| A | B | C | D | E | F |
| 16" | 9 1/4" | 7" | 7" | 7 1/2" | 6" |
Product Instructions
- Thread the female end of the adjustable quick-release loop strap into the slot on the back of the aluminum plate (it will not loop through after you have installed a high back seat).
- Determine if you have a high- or low-back seat.
- There are 8 holes on the aluminum seat plate. If using a low-back seat, align the bolt holes on the front of the seat with the holes on the plate that are closest to the hinge assembly. The back set of bolt holes on the seat will line up with the third set of holes from the hinge.
- If you are using a high-back seat, align the front bolt holes with the second set of holes from the hinge assembly. The back set of bolt holes on the seat will line up with the fourth set of holes on the aluminum plate.
- For each of the four bolt holes, place a bushing over the hole and thread a bolt with a washer into the hole. Fully hand tighten each bolt before using a wrench, then give them no more than 1/4 turn with a wrench (1/2 in. SAE, 13 mm Metric).
- Place the flip seat assembly on your frame where you would like it located, and then hand tighten the nuts until the nylon thread-locks engage.
- Using a wrench, tighten the LoPro onto the frame, making sure that the bushings sit evenly on the dry box or cooler you will be placing underneath the flip seat. (You may need to adjust the height of your cooler or drybox.) Alternate between nuts while tightening to keep the U-bolt aligned.
- Loop the male end of the adjustable buckle loop strap around the rear cross bar and tighten the strap.
'%3e%3cg id='Final-Copy-2_2_' transform='translate(1275.000000, 200.000000)'%3e%3cpath class='st0' d='M7.4,12.8h6.8l3.1-11.6H7.4C4.2,1.2,1.6,3.8,1.6,7S4.2,12.8,7.4,12.8z'/%3e%3c/g%3e%3c/g%3e%3c/g%3e%3cg id='final---dec.11-2020'%3e%3cg id='_x30_208-our-toggle' transform='translate(-1275.000000, -200.000000)'%3e%3cg id='Final-Copy-2' transform='translate(1275.000000, 200.000000)'%3e%3cpath class='st1' d='M22.6,0H7.4c-3.9,0-7,3.1-7,7s3.1,7,7,7h15.2c3.9,0,7-3.1,7-7S26.4,0,22.6,0z M1.6,7c0-3.2,2.6-5.8,5.8-5.8 h9.9l-3.1,11.6H7.4C4.2,12.8,1.6,10.2,1.6,7z'/%3e%3cpath id='x' class='st2' d='M24.6,4c0.2,0.2,0.2,0.6,0,0.8l0,0L22.5,7l2.2,2.2c0.2,0.2,0.2,0.6,0,0.8c-0.2,0.2-0.6,0.2-0.8,0 l0,0l-2.2-2.2L19.5,10c-0.2,0.2-0.6,0.2-0.8,0c-0.2-0.2-0.2-0.6,0-0.8l0,0L20.8,7l-2.2-2.2c-0.2-0.2-0.2-0.6,0-0.8 c0.2-0.2,0.6-0.2,0.8,0l0,0l2.2,2.2L23.8,4C24,3.8,24.4,3.8,24.6,4z'/%3e%3cpath id='y' class='st3' d='M12.7,4.1c0.2,0.2,0.3,0.6,0.1,0.8l0,0L8.6,9.8C8.5,9.9,8.4,10,8.3,10c-0.2,0.1-0.5,0.1-0.7-0.1l0,0 L5.4,7.7c-0.2-0.2-0.2-0.6,0-0.8c0.2-0.2,0.6-0.2,0.8,0l0,0L8,8.6l3.8-4.5C12,3.9,12.4,3.9,12.7,4.1z'/%3e%3c/g%3e%3c/g%3e%3c/g%3e%3c/g%3e%3c/svg%3e) Your Privacy Choices
Your Privacy Choices NRS Gift Card: Always Fits, Always Wanted


